Sunday, June 10, 2007

It All Went Grey And I Passed Out


As you will have guessed from the fact I have not posted a blog for a while I have lost interest in the wifes vitara and just want to get it done as quickly as possible. I did not bother to take any pictures of the inner wheel arch repairs and welding on the passenger side of the car because it was basicaly the same as the other side anyway. Nonetheless the repairs were carried out and ground back ready for filler and primer. I spent the best part of two days filling, rubbing down filling rubbing down, you get the idea, on the drivers side. I now have it in a state that I am happy to put top coat on and see what imperfections are left to deal with. Grumbling aside I am actually quite pleased with how it has come out. Mind you things always look better in primer as it is matt.


The arch looks good and with luck I will not have to buy a set of wheel arch extensions (and wider wheels and tyres). The sill area also looks ok and with luck I won't have to worry about refitting the plastic over sill covers.


I had to drill two new holes for the bottom mounts of the front wing and install two new bolts to replace the sheared off ones. While the wing was off I undersealled the inner wing just for good measure. The wing was then refitted and positioned. I have resided myself to the fact the top coat will not get done until next weekend but I needed to get the car back on the road so the wife could use it. Besides after initially refusing to drive it painted in redoxide (Having got used to seeing it that colour for so long I was starting to like it and thought it similar to the paint jobs done by GULF on their sponsored race and rally cars) when she saw it with grey primer she decided that she would be prepared to drive around like that (short term). So with that carrot dangled in front of me I set to with the passenger side.


This has been worked on for about a day and a half in the same manner as the drivers side. I still need to do more rubbing down and filling but it is close.


The front wing on this side was also removed and undersealed. With luck a couple of afternoons of prep should see this side done.

The rear panel below the boot door was another area I was hoping to ignore but then decided that while I had all my welding stuff out I may as well just do it. Once again no pics but as it still needs a little more work I will probably take some when the rear bumper comes off again. Talking of the rear bumper. I initially hoped to repair the arches without removing the bumper reinforcing panel that is bolted to the chassis. To allow access to the areas I needed to weld the arch panel to I had to cut the ends of the reinforcing panel and bend them out of the way. However when I decided to repair the rear panel I had to remove it anyway. The bolts were all rusted in and had to be ground off or drilled out. So when it came to re fitting it today I had to drill and tap all the mounting bolt holes and weld the end sections back on. When I finished for the day I slid the bumper back over the panel but Now I cant get the passenger side to slide all the way in. I will need to look at that when I have painted the rear panel repairs. I'm sure it is nothing a 2lb hammer can't sort.

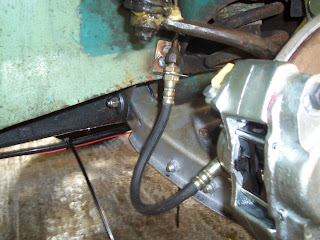
The other aspect of getting the car to drive again was the fitting of the new fuel tank. I painted it first in spray hammerite (I ought to buy shares in them) then as a belt and braces effort I undersealled it top and bottom. Paying particular attention to the areas of the old tank that had rusted out. Other than getting rather dirty (got to love non drying Waxoil underseal) and drilling and tapping the mounting holes. It went back in ok. All new hose clips to replace the rusted ones and the new filler spout/neck (another £40 on the bill) went in. I have now added two gallons of fuel and went to test it for leaks when running but the battery was dead. After that was charged up the engine started and ran as well as it did before I took it apart. As my friends will know this is no mean feet.

As a much needed distraction my Austin A40 came to the rescue again. I welt round to my friends (where the car is being stored) on Friday to fit the secondhand steering idler and try to shim the front spring on the drivers side. The steering idler was a pig of a job. In theory two track rod ends and three bolts but the access was so poor and my ball joint splitter was too large for the rodends. I ended up having to unbolt the steering arm from the hub and let the tie rod go that connects to the steering box to it could be unscrewed from the rod end. That way I could then mount it in a vice and hammer F*&£ out of it until the rodends came free. Obviously the only problem with resorting to brute force is that the threads got a little damaged. But a little filing and the nuts went on ok. The new idler was fitted and then the drivers spring was dropped out. Before I took it out I had a look see. Where the spring had been cut the end is no longer flat in a full circle and the spring had spun round and the end of the coil had dropped in a gap on the spring pan thus making the car sit lower. I decided that rather than fitting a shim under the spring I would just turn it upside down as the top seat is a full circle. I did this dropped the car to the ground and all looked well. The car was then fired up and off we went to the MOT shop for the retest. The tyres were still rubbing and by the time we got there the car was once again sitting lop sided. The spring must have rotated into a position that is making it shorter than it is. I am now looking at getting a pair of uprated springs for a midget if the length checks out ok or get a pair of standard A40 ones and just use spacers under the spring pan to get the lowering I want. As to the retest, I was unable to get it done free as it was more than 10 days since the original test so I had to pay again. Anyway it passed and the MOT certificate proves it. I just need to sort out the insurance then get the taxation class changed.

The only thing of note on driving the car is that when driving under load the engine missfires. This could be down to fuel or spark. My hunch is fuel as the engine starts and idles well and reves freely when there is no load on it. I suspect the solex carb is out of adjustment or just needs a damm good clean. I hope to cure the miss fire by fitting my go faster parts before too long. This should then make it perform a lot better. I have a choice of 3 three branch exhaust manifold to try, a set of twin carbs (1 1/4") and a 998cc mini Cooper cylinder head waiting to be fitted. Assuming the car proves itself to be reliable, as soon as the MG is mot'd and garage ready for it's engine swap I will remove the electronic ignition kit and fit that to the A40.

Thats all for now folks.

Saturday, May 26, 2007

Painting the Town Red

Finally after a grinding marathon the drivers side is smooth enough to have a coat of red oxide paint. I am planning on covering the area with a generous layer of filler and then sanding back flat. I have managed to hammer all the welded areas below flush so the filler should then hide the repairs.
The first two pics show the arch painted up.


The last two pictures show the sill areas after their coat of paint.


So other than final prep and paint this side of the car is done. Well almost. There is still the small matter of the rear floor around the body mounting like that already done on the passenger side. I would do that tommorrow but I will be round the Inlaws all day. At least I will have a chance to have a beer or ten (yeh right it's bound to be my turn to drive).

Back to the Daily Grind

I have made significant progress on the vitara so I will congratulate myself know that nobody else will bother, ie 'er indoors. I have now managed to reconstruct the inner wheel arch at the rear drivers side of the car, trim the outer wheel arch panel to suit and weld the lot to the car. If only my welding was a little flatter then I would not have to spend so long grinding it back down flush afterwards.

This first picture shows the reconstructed inner arch and the outer arch trimmed ready for the outer panel. All areas were painted in my pet paint. Red Oxide.
The next two show the rear of the inner arch around the petrol filler area.


All the welds will have seam sealer brushed over them to smooth them off before underseal is applied. The next shot shows the outer arch finally welded to the car.
This panel was difficult to fit mainly because the area around the filler was not part of the panel so it needed to be trimmed around but leave enough metal to fold into the filler recess to create the factory look. To be fair it came out ok and should look fine once filled and painted.
As with the other side the rear of the sill had to be capped off. This side was less rusty than the passenger side so the repair panel was a little smaller, as shown.

This final picture shows the detailed trimming I had to do at the rear and also shows the row of plug welds I made to attach the inner to the outer arch. I hate welding upside down. Gravity has a nasty habbit of dropping hot weld splatter down your neck. I have perfected the self preservation of ear drums technique when welding in tight spaces and upside down. I wear ear defenders. Until you have experienced a lump of red hot metal inside your ear you have not fealt pain (or fear of going deaf).


Bone Idle

Well the progress on the Vitara has been relentless. I've forgotten how many days I've been at it now. But as a disctraction (well needed I must add) I did the final prep work for the A40's MOT. Which consisted of finishing off the seam sealing and undersealing of the floor pans and giving it a damm good wash.

Below are some pictures of the car once cleaned of all the grinding dust and oily hand prints and the silver compound the police use to do finger print testing (don't ask it's not exciting).


As I'm sure you will agree it came up nice with a little T cut to get through the oil and faided paint, obviously apart from the redoxide on the repaired areas.

While cleaning the car and testing the brakes (limited testing involving going as fast forward and backwards as I could in a space of 40 feet) I noticed the drivers side to be sitting a little lower at the front. Obviously without having put any miles on the car since it has been lowered and with the 15" minilites I was concerned about clearance issues. So for the 1/2 mile drive to the MOT station I decided on a safe but slow poodle. My friend Jon came along for the ride, besides he has a pretty good relationship with the MOT man so with luck he would be fair but leanient. Besides he would also be there to laugh if the car failed spectacularly.

Pulling off the driveway tested the steering on full left hand lock. To my relife no rubbing. The car pulled well and we were soon up to the dizzy heights of 30mph. This was the first time the car had seen the road under it's own steam since before the tax ran out in 1993. I'm sure the car appreciated me being gentle. Anyway, over bumps and wallows in the road there was some tyre rub and once at the MOT station a quick look over the car showed both rear tyres to have touched (but very minor, yet on the shoulder of the tyre wich would be fairly thin) and the front drivers side. A comment was made about there being too much weight on the drivers side but I chose to ignore that and insist it was because the suspension was lower on that side.

We waited our turn and before long we were up. First test, Brake rollers. The brakes did work on the drive to the MOT shop but did not feel as sharp as I would have liked. I hoped this was down to the front pads picking up rust off the discs and thus contaminating them. The car was driven gently onto the rollers so as not to bounce the front end and rub the tyres. I was in. Front brakes were ok and the ballance was within limits. This was good news. I still may take out the pads and clean them up with a file just to make sure. Atleast the recon callipers seem to be working fine. The to the rear. Once again the wheels were dropped gently into the rollers and the foot brake was depressed. Infact so was I. The rear foot brake would not lock the rollers but as it happened they were providing enough braking force to pass the test. I plan to either replace the frame cylinder or reseal it again. the mechanial elements of the rear brakes are fine and was proved when the hand brake was tested. Both wheels locked up easily.

The car was driven out of the rollers (always fun due to the rollers spinning and more revs being required to push the car out) and on to the four post ramps. All the under body was inspected and I was advised of some rust on the rear lower corners which would have to be sorted at some point. I was aware of this and infact have the panels to do it but was hoping the car would pass without having to do it. Besides, I've had enough of welding for the time being. I'm not sure why but the car was left running through the entire test (about 40-50 minuites) which actually gave me an opportunity to see if it would boil over. It did not and the temp gauge I fitted hovered around the 170F mark so that was ok.

To cut a long story short (I know I can't) the only item the car had to be failed on was the steering idler on the passenger side was worn. Not too bad a job to do but it could be difficult getting one. So with failure sheet in hand we poodled back to Jon's house. I was quite pleased with the MOT and the test drive. The only thing I need to do now is install a shim under the drivers side front spring to lift it up level with the passenger side. This I hope will prevent any further tyre rub so long as I drive sensibly, which could be a problem for me.

Just to finish off the A40 thread here are two shots of the interior. Ignore the dust on the front parcel shelf as it was removed before the MOT so is no longer there. The interior is in very good order apart from the drivers seat which has come apart at two of the seams, but it is honest and shows its age well. As soon as I can get the car water tight (front screen rubber a must and possibly door rubbers) I will sort out the carpets.


Monday, May 21, 2007

Crusty Rusty

Progress has been made on my second day of rust repairs to my wifes Vitara. The passenger side is complete (except for gringing off the welds). The first photos show the inner sill repaied ready to accept the outer sill.
After test fitting the outer sill this was welded into place. It took forever to weld on due to my welder playing up. There is some sort of kink in the wire feed tube and all too often the wire gets caught and then rucks up after the feed rollers. To clear it you wire has to be cut and re fed into the hose. A real pain and also a waste of wire because you loose whats already in the hose each time. None the less after today I did manage to locate the part of the hose that is at fault and intend to fix that before my next round of welding on wednesday.

Back to the rust. The outer sill went on. Plug welds along the bottom and seam welded along the other edges. Please no comments on the quality of the welds because I will blame it on the welder all day long.
With that done, it only left the closing panel at the rear of the sill to be sorted. I made a card template then cut out a piece of steel the right shape folded it drilled it and Bob's your uncle.
With that done I thought it was about time I lifted the carpet to check the floor out as this was a bad area for rust on her last Vitara. Yes I know I should have removed the seat and carpet before welding but you know what I'm like. Besides I did remove the fuel tank for inspection (and safety) The fuel leak was traced to the fuel pump return line spout which had rusted off the tank meaning that excess fuel that should be going back in the tank was simply being poured over the top of it. This is also a common fault with rusty old Vitaras as I had to weld up her last one. Yes I know welding petrol tanks is a bad idea and I was worried while doing it. So this time I decided to buy a new fuel tank and be done with it. Once the old tank has been allowed to air for a while I may still weld it and sell it on (or keep it for her next one, ha ha).

Anyway, below the carpet I was greated by a few more holes. The worst of which was arounf the body mounting point. This is a multi layered area and is a pain to sort if all the layers are rusty. There are actually four layers of steel at this point. Although the picture does not tell a thousand words in this case, believe it or not this rust is good rust.

The picture above was obviously before, while the one below is obviously after.

The only other areas needing to be addressed were below the seat where a strengthening rib runs across the car and forms a water trap.


This is the same area after the repair.

All I have to do now is.

1 hope I have not buggered up the wiring to the rear of the car when I welded the sill closed.

1.5 Remove the rear bumper (to allow repairs to the rear arches) and hope there is not too much rust behind there.

2 cut out and fit the arch panel to the passenger side (when it arrives)

3 cut out the sill and arch on the drivers side.

4 fit the new petrol tank filler neck (ordered this today as it was rusted through)

5 redrill the pertol mountings as 3 out of 5 had to be cut off.

I'm sure glad I booked this week off work. Mind you I did book it off with the intention of working on my projects (A40 and MGB) but you know how it is, the wife buys a crap car and you spend your life fixing it up. Well at least thats what I end up doing anyway.

Tomorrow is an A40 day and I hope to get all the last minute jobs done ready for an MOT Thursday afternoon. Wish me luck, boy do I need some.


Saturday, May 19, 2007


I'm Turning Japanese I Really Think So.

Progress on the A40 has been slow but sure. The suspension is all assembled on the drivers side now and by removing the wheel bearing spacer I have been able to set the bearing "correctly". I am not happy with the bearings as they are so will have to do something more permanent. If I haven't thrown out the old bearings I will measure them up and get tapper roller replacements and then machine a suitable spacer to set the preload on them. The brake hose and pipe needed modifying like the passenger side but I had the sense to make two brackets so had one to hand. All the bolts were torqued up and nylocs fitted (except to the top on the kingpin as I don't have one at the moment).
With that done it was time to sort out the wheel bearing on the passenger side as well. This was sorted swiftly (thanks Jon) and the new wishbone bolts were fitted. While the front was up in the air I fitted the pads as well. All I need to do now is fit the new mini Cooper S master cylinder (suitable for disc brakes with larger reservoir) and bleed the system through. I hope to do this allong with the last grinding off and painting on Tuesday. While the car is up in the air I will also remove the return fuel line and MG Metro Turbo fuel pump as they are no longer required. Oh yes need to sort out the battery clamp as well. The with luck MOT can be booked in for Thursday afternoon.

So you may still be wondering why I am turning Japanese. Well the wife has recently bought another car. To befair her last one did die of a head gasket failure and I was too busy to fix it besides the car owed us nothing so it was sold on. Anyway, she now has a Suzuki Vitara (again). This is her 4th one now so she must like them (or at least this week she does) and I know what goes wrong and where and how to fix them. So I should be able to spot a good one and hope for her to get a nice car rather than a heap of trouble.

Wrong. Be the most impatient person in the world (I blame the parents, Ok the mother) she simply had to buy the first one she found on ebay. It was bought unseen and purely on description. To cut a long story short its a pup. It is MOT'd and drives fine with a good engine, transmission and steering (a vitara week spot) but it is as rusty as you like. The front is not too bad (apart from the parking? damage to the front corner) but the rear arches and both sills are rotten. I hoped for her to get through summer before I had to do any work on it so I could finish my other projects. But one day when she got home from work I greeted her at the door only to be confronted with the smell of pertol. There were no obvious leaks but it would need further investigation. While looking for the leak I noticed the rear piece of trim on the passenger side sill was hanging off so I gave it a little help to remove it so it did not get lost if it fell off.

This revealed what should have been the sill and wheel arch return. All was missing and you could fit your arm up the sill. Time to order some more panels. Yes more panels. I thought the drivers side was the worst on initial inspection so ordered a full sill and arch repair panel from a company called Beaver. Fantastic service, quick delivery and good prices. Sods law I had panels but not the ones I needed.

Back to today. I had the passenger side sill now so it was time to make a start. The rest of the sill covers were removed to show the sill rotted along its whole length.

The next three photos show the extent of the rust and what had to be chopped out to get back to sound metal.
Pretty bad really but nothing I can't sort out. I have got to go out now so should give a further update in the morning before starting my second day on the car.


Friday, May 11, 2007

Give Me A Brake!

With the MG still being fairly reliable (going to regret that as I'm off to Battlesbridge for a show on Sunday) I have had little to do to it. So my time has been used for making progress on my other project car. My Austin A40. The welding is now all complete other than a little grinding off and painting for the MOT mans approval. I still had the problem with the brake pedal pressure being lost over a period of time and difficulty bleeding the brakes.

I borrowed a vacuum pump from work as this includes an adapter to suck fluids through hydraulic systems. Perfect for brakes, he he. Connecting this up made bleeding the brakes an easy one man job. Afterwards the pedel felt ok but onstarting the car up ready to turn it round I actually had no brakes. I found an obvious problem fairly quickly. The pin connecting the pedal to the master cylinder rod had come out. Good job I was not driving the car then. This has now been replaced with a nut and bolt. However, after doing this I still had poor or no brakes. A quick look under the back of the car showed the frame cylinder to be operating. It had to be the fronts.

Off with the drums then. Although the brakes had been overhauled (probably about 8 years ago now) and the car having never left the garage, other than to move garage 3 times, the cylinders had seized. All four of them. I banged tapped levered and swore but to no avail. They would not budge and all I achieved was to break the casting of two of them.

Now I had a descision to make. Either repair the front brakes with four new cylinders, expected cost £20 each. Or invest a little extra and rebuild the midget front suspension and disc brakes I bought ready for a future upgrade. Well its a no brainer really and an order was placed for the bushes and bearings and brake callipers etc.

As I needed to keep the car rolling incase it needed to be moved I had to build up the suspension first ready for a quick swap over.

This photo shows the built up unit for the drivers side.

Compared to the old original parts that we later removed.

Well other than sheering off one of the lower wishbone bolts (a very bad incident especially as what happened was I accidently flicked the ratchet over to tightening and did not notice and actually tightened it until it broke) my excuse was because I was against the clock and kept getting distracted (I hope youve sorted those bloody brake lights out now Jon) and to think I used to work better under pressure.

Not a problem because I have a set of new bolts somewhere amongst my spares at home I just need to find them. A temporary bolt would do.

So with the new brakes and poly bushed suspension bolted on the passenger side the car was dropped to the floor.

Bugger, what on earth has gone wrong.
My time was up for that day so other than cursing myself for not just buying the wheel cylinders and beginning to regret swapping the front end at this stage I had no time to look at the problem. Consider that this photo was taken while the drivers side wheel was pointing directly ahead. Too much positive camber and steering lock applied. Initial diagnosis. Lever arm (top arm) too long.

After sleeping on the problem and talking it over I came to the conclusion that once again I had buckled under the pressure and fitted the top trunion 180 degrees out thus making the top arm longer than it should be. This was confirmed my an MG specialist I emailed. Another case of more haste less speed.


So my next visit to work on the car began with first undoing what I had already done to correct this mistake. The positive camber was now gone although the only problem I see now is that the track is about 1" wider on each side. Given the wheel and tyres fitted I may have a clearance issue at the front as well as the back.


The lower wishbone bolts I had were found but turned out to be rear spring bolts so were of no use. I need to order the correct parts now.


To finish off the passenger side I needed to reroute the brake hose and pipe. This was quite straightforward as I made a pair of brackets to weld to the inner wing and the brake pipe was bent to bring it to the rear of the suspension. It does not look pretty but it will work for now.
The final shot shows the new calliper through the nice 15" minilites. Just need to get on and sort the other side.

Well not quite. There is still the small matter of not being able to set the wheel bearing preload correctly. The hub nut is tight but there is still play in the bearing. This could well be my third and final personal cock up (well they say it happens in threes). After a lot of head scratching I (we, Jon) have come to the conclusion that if the bearings were installed in the hub back to front then no amount of tightening would put preeload on the bearings. My next job will therefore be to remove the bearings and check which way round I put them in. Other than that the spacer between the bearings must be too long preventing the inner races from being tightened onto the outers. We shall see.


Monday, March 26, 2007

How Low can you go?

It's been some time since my last post but what the hey, at least I still have this space for my innane driveling.

The MG has been running OK for the time being. I still have a minor (at the moment) head gasket issue as there is a little leakage from the drivers side of the head to block join. This I understand is quite common on rebuilt engines (of which mine is not) and I am not too bother by it at the moment as I still intend to change the engine at some point and it's not too bad a job to do the head gasket if it does go again. From what I have read I suspect the face of the block as one possible area of weakness along with the studs holding the head down may be weak. A guy in America had trouble sealing the head down even with the head and block skimmed. That was until he replaced the studs which finally cure his problems. I hope to keep the car going on a shoe string and do not intend spending out on what I already have and only want to spend with regard to the new engine install. Other than that the exhaust is still noisy although I have installed a base speaker in the boot floor (housed within the dish of the spare wheel) to help drown out the noise inside the cabin. I'm quite happy with it as from the outside there is no indication that it is there. All I need to do now is install two 6x9" speakers in the rear corners of the boot area. Then I will have quite a good chance of hearing the radio/cds above the noise of the car.

My other distractions have been interior diy (finally finished the stairs, and almost finished the bathroom) and progressing my Austin A40 for this years show season. Most of the welding is now complete. I only have the rear section of the sill on the drivers side to finish then its off to the MOT man to see what he thinks. Mechanically it is almost there. The car starts on the button and purs like a sewing machine. I'm sure I can soon mess that up once I start to play with it. Poor old thing (the car not me). The only area that needs attention is the brakes. These were overhauled about 7 years ago, maybe more. The pedal pressure is lost after a period of time so there must be a leak somewhere or a lot of air still in the system. There does not appear to be any leaks from any of the cylinders and no puddle in the foot well. So any leaks must be interal from a possible damaged seal in the master cylinder. I have won a replacement unit off ebay and as soon as I have the money I will pay him. Oops sorry for the delay mate. The reason for my delay was the expected sale of my latest bargain. I bought a Frontera off a friend and after MOTing it and using it for three months I put it up for sale on ebay. It sold but on the day the guy was supposed to collect it he came up with some story about a family problem. Blah Blah Blah. Sounds like one of my excusses. Anyway I now have one of the other bidders lined up to buy it. Lets see what happens with that then.

Back to the A40. I am doing all the work on the car round at a friends house (a very kind chap who is very patient with my slow progress) and was told that he could not allow me to take the car for its MOT until I lowered the front suspension.

The reason for this was that I have fitted a set of 15" miniltes to the car and the rear springs have sagged with age yet they look perfect and make the rear end look really cool in a modern low style. However the front springs had not sagged meaning that the car looked like a dog begging for it's supper. I relented and as a distraction from cutting out rust we attacked the front end. I took a grinder to the front springs cutting a complete coil out and then added 3/8" spacers under the spring pans to give some more lowering effect. The result. Wow. The car looked the nuts (even it I could not get the jack out from under the car). The height of the front wheel arch was exactly the same as that at the rear with the tyre just tucked under the lip. The only problem is that with even light pressure on the wing and with very little lock on the steering the tyres fouled. Bugger I knew this was a bad idea.

Anyway, I'm glad we put the spacers in as these were easier to refit than welding the springs back together (only joking I would have brazed them) After the spacers were removed the ride heght was increased by about an inch and the car still looked great. Here are some pictures before and after. The last picture is a little dark as the batteries were going on the camera and the flash would not work.


Saturday, November 25, 2006

Pretty Fly For A White Guy

Before the engine was mounted on it's trolly I needed to adapt the back plate to fit. This I did by using a Rover 820 back plate, cutting the excess material off it and using a fixture I made up to locate the center line of the crank I was able to clamp it to the MGB back place. I could then drill through the holes and thus make the MGB part fit the Rover engine.

Once the back plate was done it was bolted to the engine and the flywheel fitted.


By using the MGB flywheel I can use the standard MGB starter motor and clutch. However, because this engine will be a lot more powerful than the old unit I will be fitting an uprated clutch. The other bonus is that I can now bolt up a standard 4 syncro gearbox to the new engine. My car is fitted with an ordinary 4 speed gearbox. But, I do have a couple (as you do) of spare 4 syncro with overdrive gearboxes. One of which I have cleaned up and inspected.


This shot shows the cleaned gearbox partially assembled, obviously with out the overdrive unit fitted. The reason it was not fitted was because when I reassembled it I forgot to line up the sprines inside it so I could only slide it part way on to the output shaft of the gearbox.


This shot shows the gearbox finally mated to the T series block. Still without the overdrive though. In the forground you can see the Rover 820 back plate I used to locate the holes I needed to drill in the MGB back plate.

So the situation at this moment in time is. I have a new engine and a gearbox that fits it. I can now wheel the engine around my garage if I need to move it. I have partly fabricated my inlet manifold. To which I will be fitting a set of carbs from a Suzuki GSXR 1100 motorbike (more of this later) and I have started to fabricate what will be a tubular exhaust manifold from stainless steel I have laying around. As for ignition I have bought a megajolt unit. I will explain each of these items in more deatil as I make progree on them. Wish me luck.